The purpose of this project is to make a cheap but effective VLF metal detector. If you want to support the project you can make your donation here! Thank you!
Metal Detector "Smart Hunter"
Metal detector “Smart Hunter” is a project that will help you build a powerful VLF metal detector. This metal detector is based on an Arduino microcontroller and a smartphone. Here you will find all the necessary tutorials. Just follow the tutorials step by step and if you have any questions contact us. This metal detector is able to detect a gold ring or a coin at a distance of 30 cm, a lid of a pot with the diameter of 20 cm can detect at 90 cm! Start now and build your own “Smart Hunter” metal detector!
Premium Version
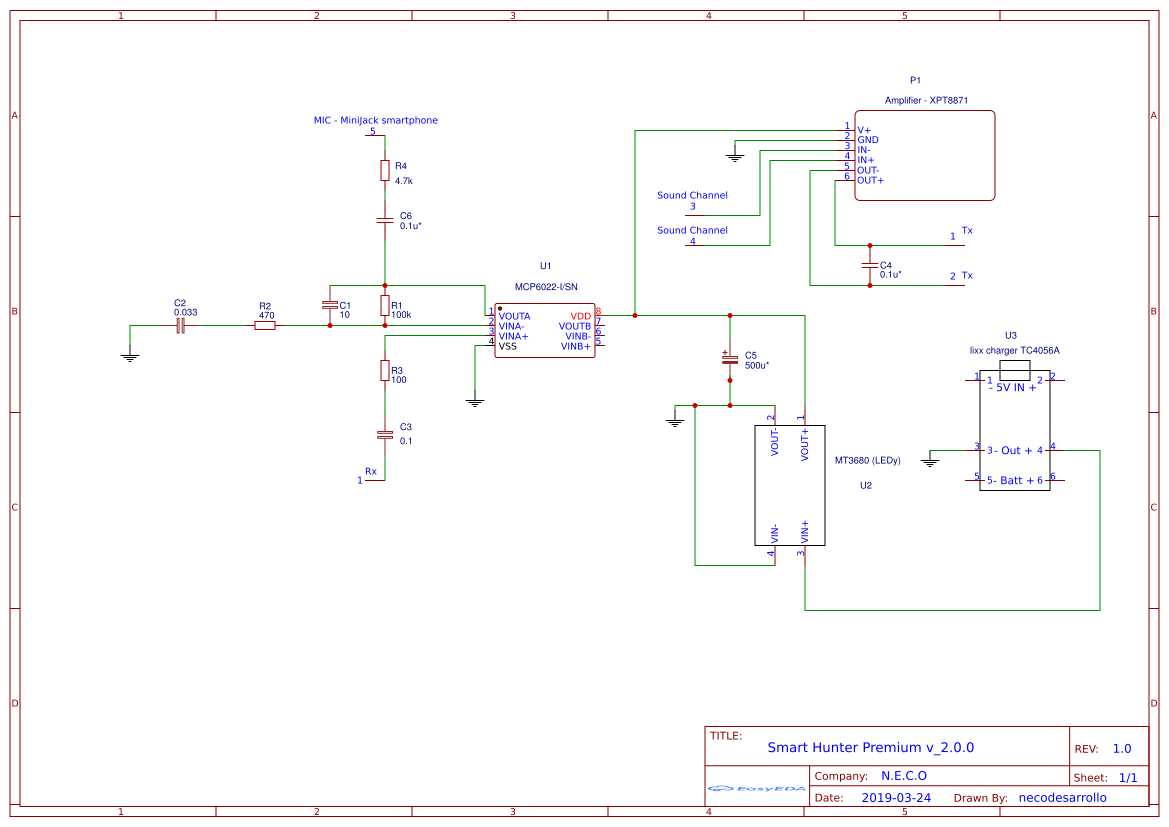
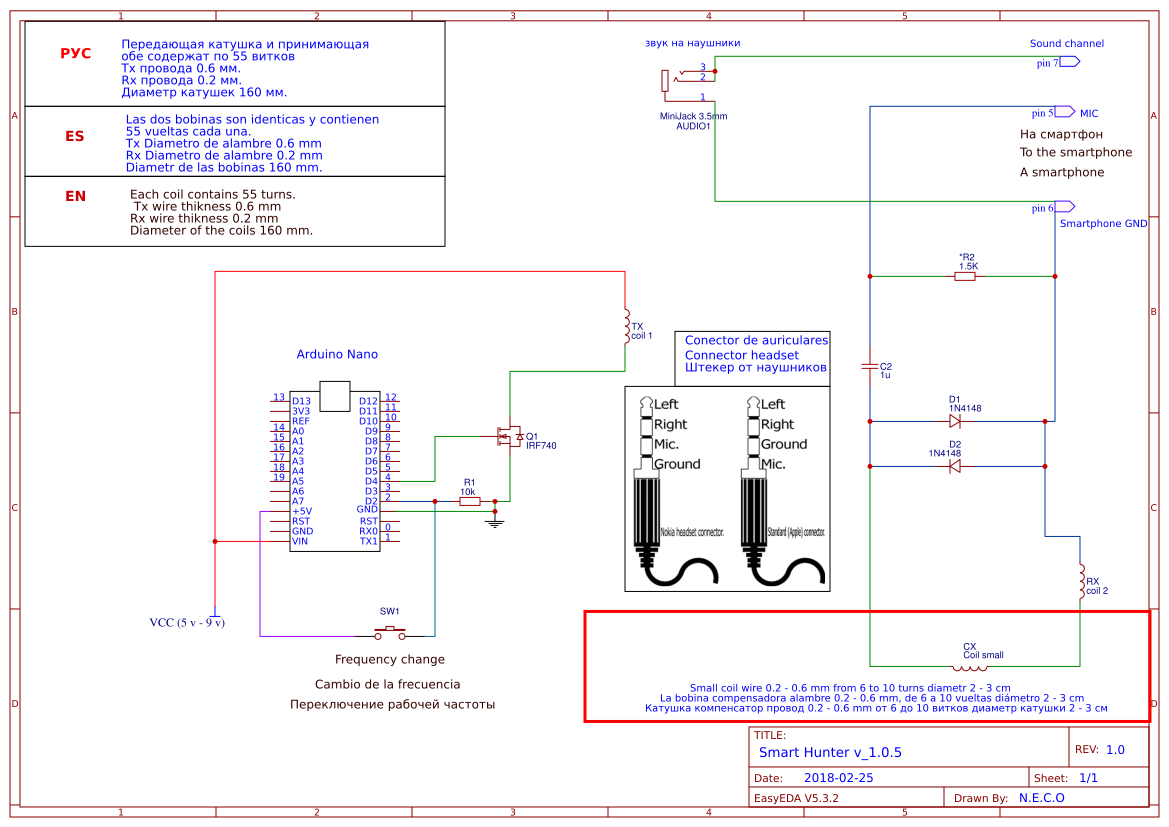
Premium version is a bit different from the free version because it has an internal generator, so in the Premium version it is not necessary to use arduino nor the MOSFET, which facilitates the assembly. The frequency of internal generator can already be chosen within the app in the PRO menu. The generator can generate from 20 Hz to 20 kHz but to detect what we are going to do we will need only from 4 kHz to 20kHz, because the working frequency of most of the “VLF” metal detectors is between 4 kHz and 20 kHz. The assembly is the same as in the free version, but in the Premium version it is easier for not using the arduino and also cheaper. Operation of the internal generator: internal generator generates the sine wave with the selected frequency and the generator signal goes to the transmitter coil (Tx), but since the signal is weak, we must amplify it, that’s why we use an amplifier. In the online store Aliexpress there are many different amplifiers, in the video tutorial i use one of those cheap amplifiers. This amplifier is cheap and very easy to use, has only input/output and power “5v” . The receiver coil still unchanged as in the free version. That means that we mount the receiver coil (Rx) as we can see in the schematic, only if we use Premium version we no longer need the arduino part. On the internet there many schematics how to make an homemade amplifier , so if somebody want to build a homemade amplifier it also will work. The amplifier used in this video has output 3 watts , if we are going to use the coil with bigger size then we must use amplifier with output 15 watts more or less ( depends on the size of the coil). Below in the section “Free Version” we can find video tutorials how to make the coils and how to adjust them, this assembly is the same for the both coils. ,
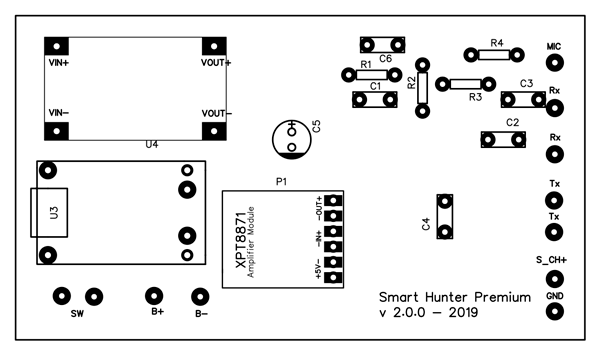
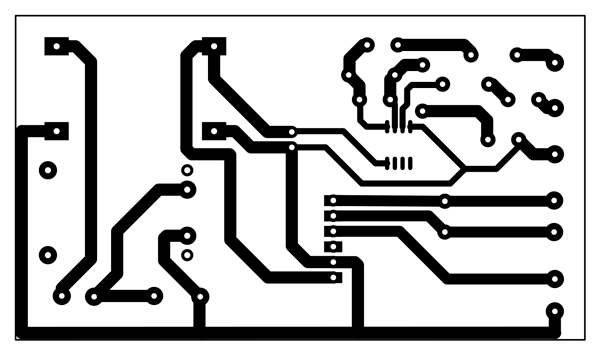
The PCB of version 2.0.0
A new version of the PCB has been launched. In the new version 2.0.0 a preamplifier has been added to the receiver coil, which has considerably increased the sensitivity and stability of this MD. When using this version, you must select the value of the “Rx splitter” 1000 or 500 in the application configuration. You can try an other values, but the tests showed that these are the two most optimal values. You can also try changing the volume of multimedia on your smartphone, since it is responsible for the strength of the signal that goes to the transmission coil. Increase the volume almost to the maximum for more sensitivity. Increasing the sensitivity without losing stability can change the resistance R4. Less than 1.5k, I do not recommend putting, you have keep in mind if we increase the value of this resistance the sensitivity decreases, but the stability improves.
Assemble the PCB and tests (Soon wil be translated):
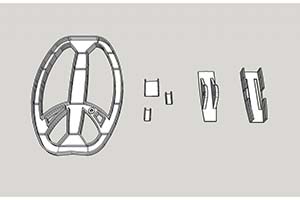
Here you can download 3D coil model for printing on 3D printer. It’s free! Just download it and it ready to print! Inside the file you can find full 3D model for printers with hotbed bigger than 300x300mm, and also 3D models for printers with hotbed less than 300x300mm. Enjoy!