LC Meter user guide
Build a small sound-based circuit and measure coils and capacitors with your phone. No cable: the app listens to the circuit through the microphone.
What do you want to measure?
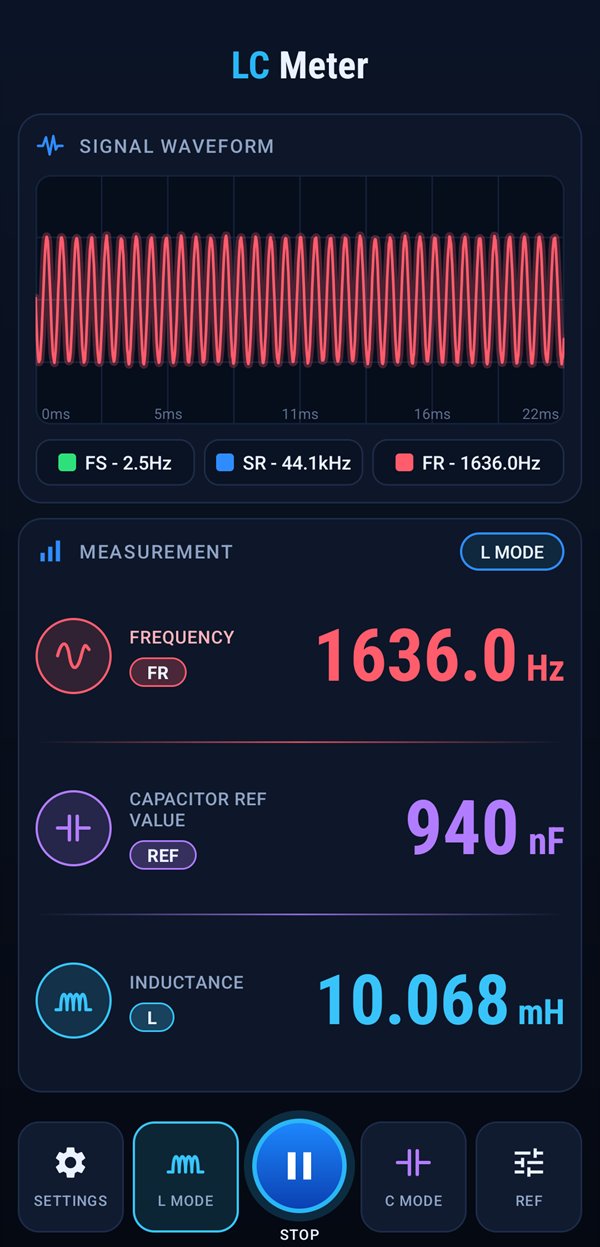
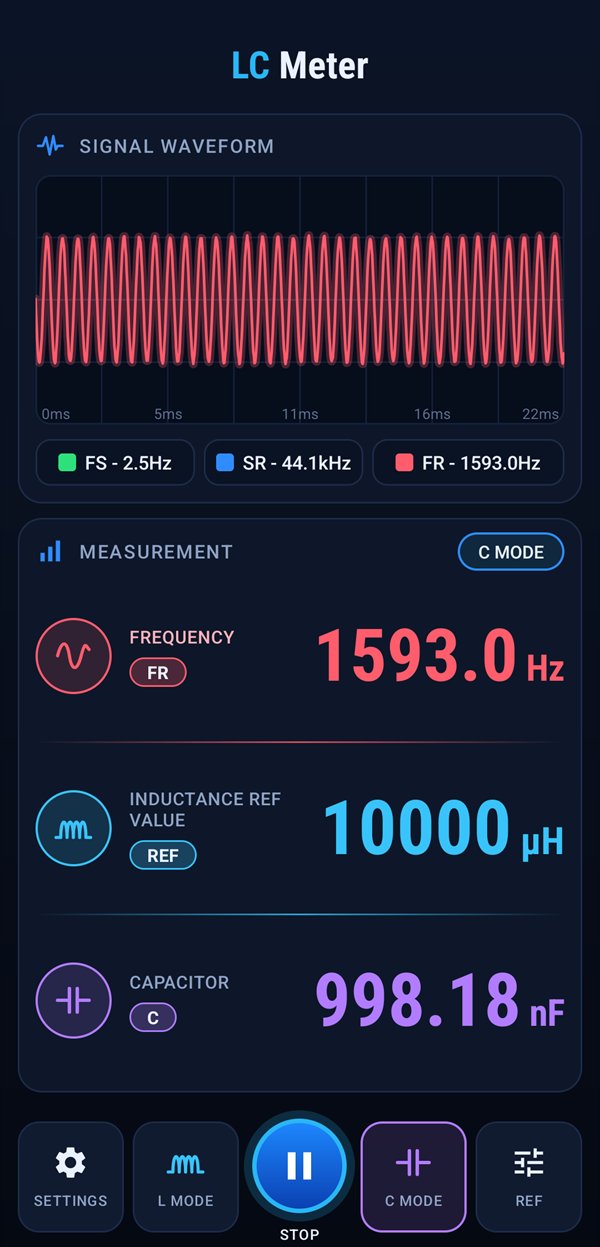
How it works
A coil and a capacitor connected together ring at one frequency, their resonance. If you know one of the two parts, the frequency tells you the value of the other.
- 1The circuit oscillatesYour part and a known reference part form an LC circuit. Two transistors keep it oscillating at its resonance frequency.
- 2The buzzer plays itA third transistor drives a small buzzer, so you hear the resonance as a steady tone.
- 3The phone does the mathThe app finds the tone's frequency through the microphone and calculates the inductance or capacitance.
The app uses the resonance formula f = 1 / (2π √(L·C)). The reference value is the part you know; the result is the part you are measuring.
Build the circuit
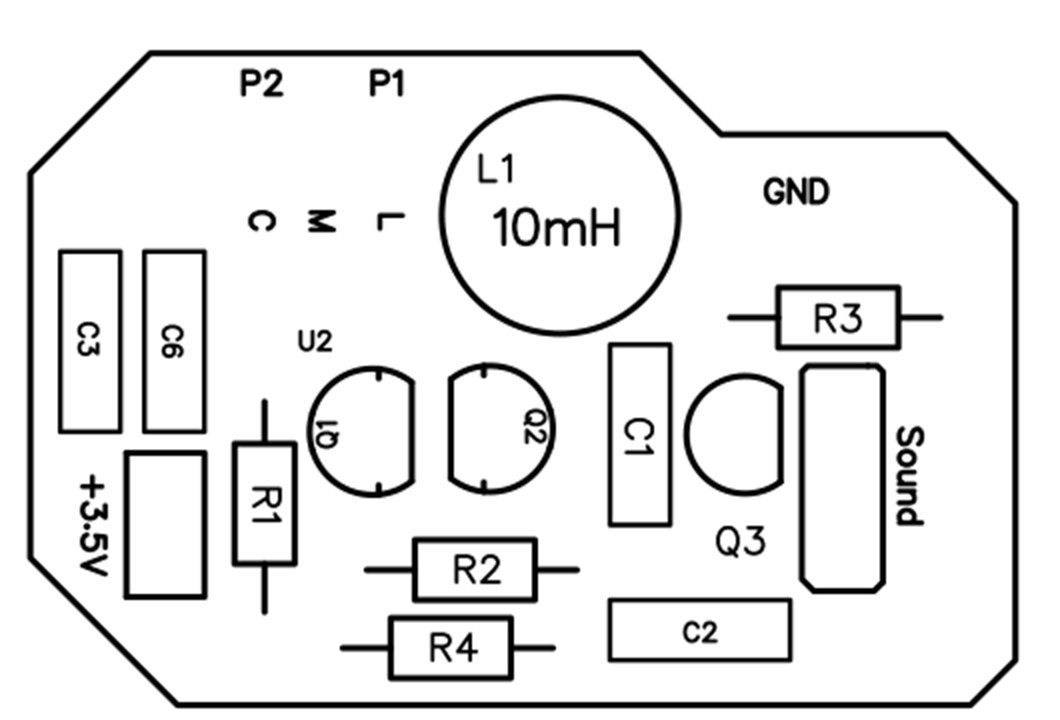
Everything fits on a small single-sided board. You can order it from the Gerber files, etch it at home, or build it on a perfboard following the schematic.
What you need
| Part | Value |
|---|---|
| C1, C2, C3, C4 | 470 nF polyester capacitor (C4 is marked C6 on the board) |
| L1 | 10 mH coil |
| Q1, Q2 | BC557 transistor (PNP) |
| Q3 | BC547 transistor (NPN) |
| R1, R2 | 10 kΩ, 100 Ω |
| R3, R4 | 220 kΩ, 5.1 kΩ |
| U2 | 3-pin slide switch |
| Sound | Passive piezo buzzer, without a built-in generator |
- A 3.5 to 5 V power supplyThree AA batteries, a Li-ion cell or a USB power bank.
- Two test leadsCrocodile clips on P1 and P2 make it quick to swap parts.
- An Android phoneWith LC Meter installed.
- A multimeter with a capacitance rangeOptional. Helps you check the reference parts for best accuracy.
Schematic and board
The reference parts are C3 + C4 (940 nF together) and L1 (10 mH). These are the values the app uses by default.

Watch the build
A step-by-step video of building and testing the board. The video is in Russian, but every step is easy to follow on screen. YouTube can show translated subtitles.
Assemble it
-
1
Solder the parts
Follow the labels on the board. Start with the resistors, then the capacitors, the coil, the transistors and the switch.
- Q1 and Q2 are BC557, Q3 is BC547. Match each flat side to the drawing.
- Use polyester (film) capacitors for C3 and C4. Ceramic ones drift with temperature and make readings less stable.
-
2
Connect the buzzer, power and test leads
Solder the buzzer to Sound, the battery to +3.5V and GND, and a test lead to each of P1 and P2.
Use a passive buzzer. One with a built-in generator beeps at its own fixed pitch, and the app would measure that instead of your part.
-
3
Check it
Clip any coil or capacitor to the test leads, set the switch to match it and power the board. You should hear a steady tone. If it stays silent, see If something doesn't work below.
Get to know the screen
The numbers match the list next to the screenshot.
- 1Signal waveformThe sound the microphone hears. A clean, even wave means a good reading.
- 2FS, SR, FRFrequency step, the microphone sample rate (44.1 kHz) and the resonance frequency found.
- 3ModeL mode measures a coil, C mode a capacitor.
- 4FrequencyThe resonance frequency of your circuit, in hertz.
- 5Reference valueThe known part on the board: the capacitor in L mode, the coil in C mode.
- 6ResultThe value of the part on P1 and P2. A dash means no valid reading yet.
- 7SettingsReference values, Pro version, and links.
- 8L modeMeasure a coil.
- 9Start / StopStarts and stops listening.
- 10C modeMeasure a capacitor.
- 11RefType the exact value of the reference part.
Measure a coil
The board uses its 940 nF reference capacitor, and the app calculates the coil from the tone.
-
1
Set the switch to L
The switch connects M to L. Clip the coil to P1 and P2 and power the board.
-
2
Choose L mode and start
Open LC Meter, tap L Mode, then the round Start button. Allow microphone access the first time.
Hold the phone a few centimeters from the buzzer, in a quiet room. The inductance appears at the bottom, in nH, µH, mH or H.
-
3
Stop
Tap Stop when you are done. The last reading stays on the screen.
Measure a capacitor
The board uses its 10 mH reference coil, and the app calculates the capacitor from the tone.
-
1
Set the switch to C
The switch connects M to C. Clip the capacitor to P1 and P2 and power the board.
-
2
Choose C mode and start
Open LC Meter, tap C Mode, then the round Start button. Allow microphone access the first time.
Hold the phone a few centimeters from the buzzer, in a quiet room. The capacitance appears at the bottom, in nF or µF.
-
3
Stop
Tap Stop when you are done. The last reading stays on the screen.
Get accurate readings
The result is only as accurate as the reference value. Real parts are rarely exactly 940 nF and 10 mH, so tell the app their true values.
-
1
Enter the reference value
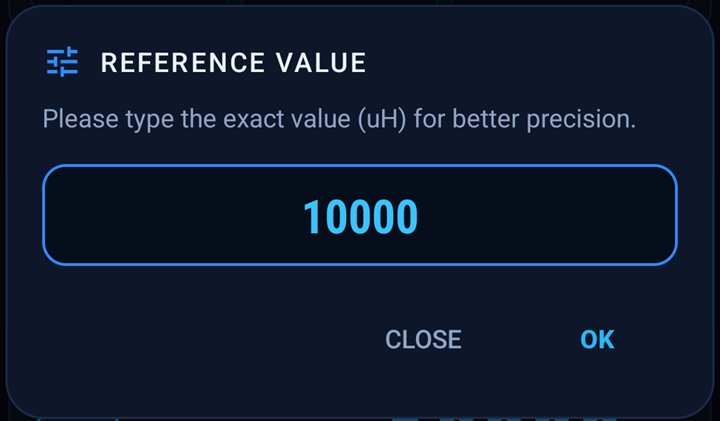
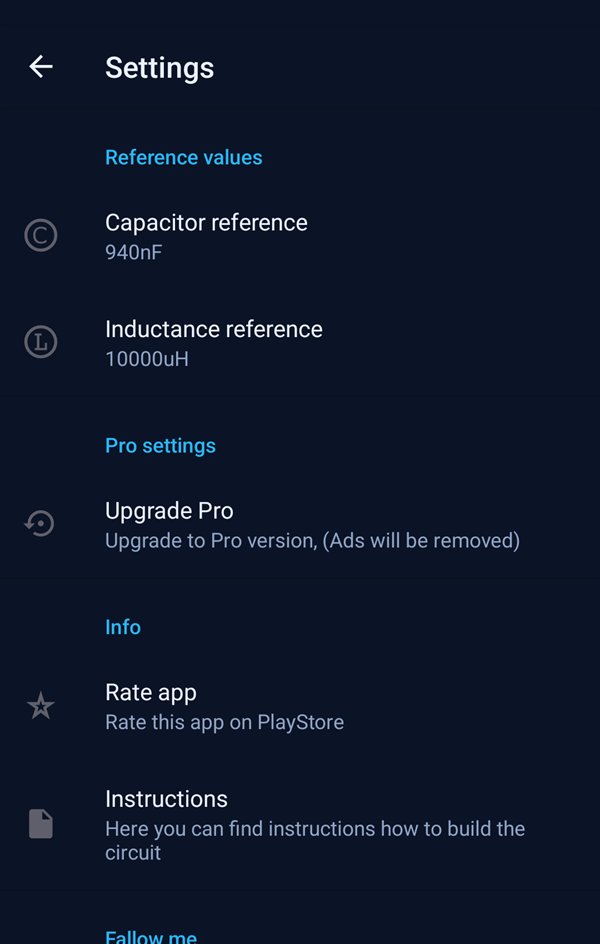
Tap Ref. In L mode it asks for the capacitor in nF, in C mode for the coil in µH. Type the value and tap OK.
You can also change both in Settings › Reference values. A comma or a dot both work as the decimal separator.
-
2
Calibrate with a part you know
No capacitance meter? Measure a part whose value you trust, for example a 1% film capacitor in C mode. If the reading is off, adjust the reference coil value until the result matches.
Do the same with a known coil in L mode for the reference capacitor.
- Measure in a quiet room. Voices, music or a fan can be louder than the buzzer.
- Keep the phone close to the buzzer and don't move it while measuring.
- Take parts out of their circuit first. Other parts around them change the reading.
- Keep the test leads short. Long wires add their own inductance and capacitance.
What you can measure
Phone microphones hear roughly 100 Hz to 16 kHz well. These are the tones you can expect with the standard reference parts. Readings are most precise between about 1 and 16 kHz.
Coils, with the 940 nF capacitor
| Coil | Tone |
|---|---|
| 100 µH | 16.4 kHz |
| 1 mH | 5.2 kHz |
| 10 mH | 1.6 kHz |
| 100 mH | 520 Hz |
| 1 H | 164 Hz |
Capacitors, with the 10 mH coil
| Capacitor | Tone |
|---|---|
| 10 nF | 15.9 kHz |
| 100 nF | 5.0 kHz |
| 1 µF | 1.6 kHz |
| 10 µF | 500 Hz |
| 100 µF | 160 Hz |
Free and Pro
Every measuring feature works in the free version, which shows ads. Pro removes all ads with a one-time purchase: open Settings › Upgrade Pro.
If something doesn't work
The board makes no sound
Check the battery polarity and that it gives at least 3.5 V. Check that Q1 and Q2 are BC557 and Q3 is BC547, each turned as drawn on the board.
The circuit only oscillates with a part on P1 and P2, and with the switch set to match it: L for a coil, C for a capacitor.
The reading jumps around
The microphone hears other sounds too. Move to a quiet place, hold the phone closer to the buzzer and keep it still. The waveform on the screen should look like an even wave.
The result is far from the expected value
Check that the mode in the app matches the switch: L mode with the switch on L, C mode with the switch on C.
Then check the reference value. The capacitor is in nF and the coil in µH, so 10 mH is 10000.
The result shows a dash
The app hasn't heard a tone it can use, or the value is outside what it can show. Check that the board is beeping, then try a part closer to the middle of the range table above.
Very small or very large parts don't work
Small parts give a tone that is too high for the microphone, large parts one that is too low. Change the reference part on the board to bring the tone back into range, and type its new value in the app.
Does the app record me?
No. The app analyzes the sound while you measure and doesn't save or send any audio. The microphone permission is needed only to hear the buzzer.